Encryption and Decryption

using System;
using System.Collections.Generic;
using System.ComponentModel;
using System.Data;
using System.Drawing;
using System.Linq;
using System.Text;
using System.Threading.Tasks;
using System.Windows.Forms;
namespace WindowsFormsApplication1
{
public partial class Form1 : Form
{
String alphabet = "ABCDEFGHIJKLMNOPQRSTUVWXYZ";
int key = 0;
public Form1()
{
InitializeComponent();
}
private void button1_Click(object sender, EventArgs e)
{//Encryption
String word = txt_encrypt.Text.ToUpper();
String encrypted = "";
key = Int32.Parse(txt_key.Text);
for (int l = 0; l <= word.Length-1;l++ )
{
int index = findLetter(word[l]);
int encryptionValue = (key * index + 3) % 26;
encrypted = encrypted + alphabet[encryptionValue];
}
txt_dcrypt.Text = encrypted;
}
public int findLetter(char s) {
for (int i = 0; i<=25;i++ )
{
if(alphabet[i]==s){
return i;
}
}
return 0;
}
private void button2_Click(object sender, EventArgs e)
{//Decryption
String word = txt_dcrypt.Text;
String decrypted = "";
for (int l = 0; l <= word.Length - 1; l++)
{
int index = findLetter(word[l]);
int inverse = findMinus(key);
int decryptionValue = (inverse*( index-3)) % 26;
decrypted = decrypted + alphabet[decryptionValue];
}
txt_encrpt1.Text = decrypted;
}
public int findMinus(int a) {
for (int i = 0; i <= 26;i++ )
{
if((a*i)%26 == 1){
return i;
}
}
return 0;
}
private void txt_encrpt1_TextChanged(object sender, EventArgs e)
{
}
}
}
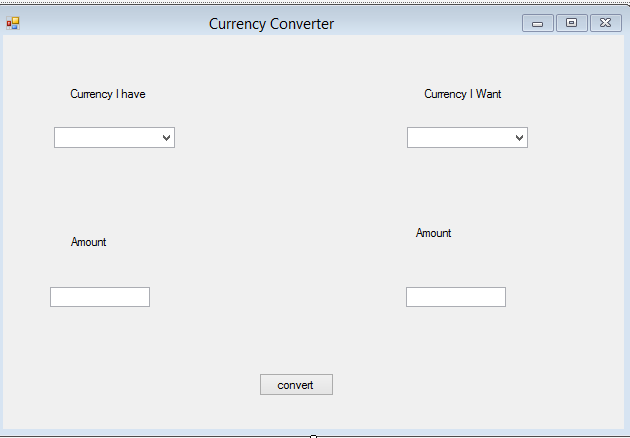
Currency Converter
WSDL : http://www.webservicex.com/CurrencyConvertor.asmx?wsdl
Form1.cs
using System;
using System.Collections.Generic;
using System.ComponentModel;
using System.Data;
using System.Drawing;
using System.Linq;
using System.Text;
using System.Threading.Tasks;
using System.Windows.Forms;
namespace MyCurrency
{
public partial class Form1 : Form
{
enum Currency
{
AFA,
ALL,
DZD,
ARS,
AWG,
AUD,
BSD,
BHD,
BDT,
BBD,
BZD,
BMD,
BTN,
BOB,
BWP,
BRL,
GBP,
BND,
BIF,
XOF,
XAF,
KHR,
CAD,
CVE,
KYD,
CLP,
CNY,
COP,
KMF,
CRC,
HRK,
CUP,
CYP,
CZK,
DKK,
DJF,
DOP,
XCD,
EGP,
SVC,
EEK,
ETB,
EUR,
FKP,
GMD,
GHC,
GIP,
XAU,
GTQ,
GNF,
GYD,
HTG,
HNL,
HKD,
HUF,
ISK,
INR,
IDR,
IQD,
ILS,
JMD,
JPY,
JOD,
KZT,
KES,
KRW,
KWD,
LAK,
LVL,
LBP,
LSL,
LRD,
LYD,
LTL,
MOP,
MKD,
MGF,
MWK,
MYR,
MVR,
MTL,
MRO,
MUR,
MXN,
MDL,
MNT,
MAD,
MZM,
MMK,
NAD,
NPR,
ANG,
NZD,
NIO,
NGN,
KPW,
NOK,
OMR,
XPF,
PKR,
XPD,
PAB,
PGK,
PYG,
PEN,
PHP,
XPT,
PLN,
QAR,
ROL,
RUB,
WST,
STD,
SAR,
SCR,
SLL,
XAG,
SGD,
SKK,
SIT,
SBD,
SOS,
ZAR,
LKR,
SHP,
SDD,
SRG,
SZL,
SEK,
CHF,
SYP,
TWD,
TZS,
THB,
TOP,
TTD,
TND,
TRL,
USD,
AED,
UGX,
UAH,
UYU,
VUV,
VEB,
VND,
YER,
YUM,
ZMK,
ZWD,
TRY
}
public Form1()
{
InitializeComponent();
foreach (var item in Enum.GetValues(typeof(Currency)))
{
combohave.Items.Add(item);
combowant.Items.Add(item);
}
combohave.Sorted = true;
combowant.Sorted = true;
}
private void label2_Click(object sender, EventArgs e)
{
}
private void button1_Click(object sender, EventArgs e)
{
CurrencyServiceReference.CurrencyConvertorSoapClient currencyConvert = new CurrencyServiceReference.CurrencyConvertorSoapClient("CurrencyConvertorSoap12");
CurrencyServiceReference.Currency cfrom=(CurrencyServiceReference.Currency)combohave.SelectedItem;
CurrencyServiceReference.Currency cto=(CurrencyServiceReference.Currency)combowant.SelectedItem;
double rate = currencyConvert.ConversionRate(cfrom, cto);
txtto.Text = (Convert.ToDouble(txtfrom.Text) * rate).ToString();
}
}
}
No SQL mongoDB
1)create new folder
C:\MongoDB\data
C:\MongoDB\log
2)create Mongo.config file
dbpath=C:\MongoDB\data
logpath=C:\MongoDB\log\mongodb.log
diaglog=3
goto cmd: C:\MongoDB\mongodb-win32-x86_64-2008plus-2.6.4\bin
execute to start server :mongod.exe --config="C:\MongoDB\Mongo.config"
Task 2 – Create new database and
collection for storing user data
1. Connect to
MongoDB server using MongoVUE.
2. Create new
database by right clicking on the server node and selecting “Add Database”.
Name the new database as “usermanager”.
3. Add new
collection to usermanager database by right clicking on the database node and
selecting “Add Collection”. Name the new collection as “user”.
Task 3 – Create client application
1. Open
Eclipse and create a new java project.
a. Select File
> New > Project.
b. Expand
‘Java’ node and select ‘Java Project’. Click ‘Next’.
c. Name the
project as ‘UserManager’ and click ‘Finish’.
2. Add MongoDB
Java driver to the classpath.
a. Right click
project node and select ‘Properties’.
b. Select
‘Java Build Path’ and go to ‘Libraries’ tab.
c. Click on
‘Add External JARs’ button and browse for the jar file.
d. Click ‘OK’
to close the window.
3. Add ‘DBManager’
singleton class for managing database connections
a. Right click
src node > New > Class.
b. Name the
new class as DBManager.
c. Click
‘Finish’.
d. Add the
following code to the new class:
1. Create DBManager class
import java.net.UnknownHostException;
import com.mongodb.DB;
import com.mongodb.MongoClient;
public class DBManager {
private static DB database;
public static DB getDatabase(){
if(database==null){
MongoClient mongo;
try {
mongo = new MongoClient("localhost",27017);
database = mongo.getDB("usermanager");
} catch (UnknownHostException e) {
e.printStackTrace();
}
}
return database;
}
}
2. User POJO class
public class User {
private int id;
private String firtNmae;
private String lastName;
private String email;
/* public User() {
super();
}
public User(int id) {
super();
this.id = id;
}*/
public int getId() {
return id;
}
public void setId(int id) {
this.id = id;
}
public String getFirtNmae() {
return firtNmae;
}
public void setFirtNmae(String firtNmae) {
this.firtNmae = firtNmae;
}
public String getLastName() {
return lastName;
}
public void setLastName(String lastName) {
this.lastName = lastName;
}
public String getEmail() {
return email;
}
public void setEmail(String email) {
this.email = email;
}
}
Main Method
Imports
import com.mongodb.BasicDBList;
import com.mongodb.BasicDBObjectBuilder;
import com.mongodb.DB;
import com.mongodb.DBCollection;
import com.mongodb.DBCursor;
import com.mongodb.DBObject;
import com.mongodb.WriteResult;
3. Add user codes
Bold methods implementation are mentioned below
Add user Button Click
JButton btnAddUser = new JButton("Add User");
btnAddUser.addActionListener(new ActionListener() {
public void actionPerformed(ActionEvent arg0) {
User newUser = new User();
newUser.setId(Integer.parseInt(txtid.getText()));
newUser.setFirtNmae(txtname.getText());
newUser.setLastName(txtlastname.getText());
newUser.setEmail(txtemail.getText());
DBObject doc =createDBObject(newUser);
DB userDB = DBManager.getDatabase();
DBCollection col = userDB.getCollection("user");
WriteResult result = col.insert(doc);
}
});
4.Update user button click
JButton btnUpdateUser = new JButton("Update User");
btnUpdateUser.addActionListener(new ActionListener() {
public void actionPerformed(ActionEvent e) {
//updating values
User newUser = new User();
newUser.setFirtNmae(txtname.getText());
newUser.setLastName(txtlastname.getText());
newUser.setEmail(txtemail.getText());
DBObject doc =createUpdateDBObject(newUser);
//Key for update values
User newUser2 = new User();
newUser2.setId(Integer.parseInt(txtid.getText()));
DBObject key = createIdDBObject(newUser2);
DB userDB = DBManager.getDatabase();
DBCollection col = userDB.getCollection("user");
WriteResult result = col.update(key, doc);
}
});
5.Delete User button click
JButton btnRemoveUser = new JButton("Remove User");
btnRemoveUser.addActionListener(new ActionListener() {
public void actionPerformed(ActionEvent arg0) {
User newUser = new User();
newUser.setId(Integer.parseInt(txtid.getText()));
DBObject doc =createIdDBObject(newUser);
DB userDB = DBManager.getDatabase();
DBCollection col = userDB.getCollection("user");
WriteResult result = col.remove(doc);
}
});
Bold methods
private static DBObject createDBObject(User user){
BasicDBObjectBuilder docBuilder = BasicDBObjectBuilder.start();
docBuilder.append("_id", user.getId());
docBuilder.append("firstName", user.getFirtNmae());
docBuilder.append("lastName", user.getLastName());
docBuilder.append("email", user.getEmail());
return docBuilder.get();
}
private static DBObject createUpdateDBObject(User user){
BasicDBObjectBuilder docBuilder = BasicDBObjectBuilder.start();
docBuilder.append("firstName", user.getFirtNmae());
docBuilder.append("lastName", user.getLastName());
docBuilder.append("email", user.getEmail());
return docBuilder.get();
}
private static DBObject createIdDBObject(User user){
BasicDBObjectBuilder docBuilder = BasicDBObjectBuilder.start();
docBuilder.append("_id", user.getId());
return docBuilder.get();
}
View All/Search method
public static void viewAll( ){
try{
DB userDB = DBManager.getDatabase();
DBCollection coll = userDB.getCollection("user");
DBCursor cursor = coll.find();
int i=1;
while (cursor.hasNext()) {
System.out.println("Inserted Document: "+i);
System.out.println(cursor.next());
i++;
}
}catch(Exception e){
System.err.println( e.getClass().getName() + ": " + e.getMessage() );
}
}
---------------------------------------------------------------------------------------------------------------------
EmployeeManager.java
import java.awt.BorderLayout;
import java.awt.EventQueue;
import javax.swing.JFrame;
import javax.swing.JPanel;
import javax.swing.border.EmptyBorder;
import com.mongodb.BasicDBObjectBuilder;
import com.mongodb.DB;
import com.mongodb.DBCollection;
import com.mongodb.DBCursor;
import com.mongodb.DBObject;
import com.mongodb.WriteResult;
import javax.swing.JOptionPane;
import javax.swing.JTabbedPane;
import javax.swing.JLabel;
import javax.swing.JTextField;
import javax.swing.JPasswordField;
import javax.swing.JButton;
import java.awt.event.ActionListener;
import java.awt.event.ActionEvent;
public class EmployeeManager extends JFrame {
private JPanel contentPane;
private JTextField txt_id;
private JTextField txt_fname;
private JTextField txt_lname;
private JTextField txt_email;
private JTextField txt_username;
private JPasswordField txt_password;
private boolean employeAvailable = false;
/**
* Launch the application.
*/
public static void main(String[] args) {
EventQueue.invokeLater(new Runnable() {
public void run() {
try {
EmployeeManager frame = new EmployeeManager();
frame.setVisible(true);
} catch (Exception e) {
e.printStackTrace();
}
}
});
}
private static DBObject createDBObject(Employee emp) {
BasicDBObjectBuilder docBuilder = BasicDBObjectBuilder.start();
docBuilder.append("_id", emp.getId());
docBuilder.append("firstName", emp.getFirtName());
docBuilder.append("lastName", emp.getLastName());
docBuilder.append("email", emp.getEmail());
docBuilder.append("username", emp.getUsername());
docBuilder.append("pwd", emp.getPwd());
return docBuilder.get();
}
/**
* Create the frame.
*/
public EmployeeManager() {
setDefaultCloseOperation(JFrame.EXIT_ON_CLOSE);
setBounds(100, 100, 448, 451);
contentPane = new JPanel();
contentPane.setBorder(new EmptyBorder(5, 5, 5, 5));
setContentPane(contentPane);
contentPane.setLayout(null);
JTabbedPane tabbedPane = new JTabbedPane(JTabbedPane.TOP);
tabbedPane.setBounds(0, 0, 434, 412);
contentPane.add(tabbedPane);
JPanel panel = new JPanel();
tabbedPane.addTab("Add Employee", null, panel, null);
panel.setLayout(null);
JLabel lblNewLabel = new JLabel("ID");
lblNewLabel.setBounds(10, 22, 46, 14);
panel.add(lblNewLabel);
JLabel lblNewLabel_1 = new JLabel("First Name");
lblNewLabel_1.setBounds(10, 79, 62, 14);
panel.add(lblNewLabel_1);
JLabel lblNewLabel_2 = new JLabel("Last Name");
lblNewLabel_2.setBounds(10, 133, 75, 14);
panel.add(lblNewLabel_2);
JLabel lblNewLabel_3 = new JLabel("Email");
lblNewLabel_3.setBounds(10, 187, 46, 14);
panel.add(lblNewLabel_3);
JLabel lblUserName = new JLabel("User Name");
lblUserName.setBounds(10, 239, 62, 14);
panel.add(lblUserName);
JLabel lblPassword = new JLabel("Password");
lblPassword.setBounds(10, 299, 62, 14);
panel.add(lblPassword);
txt_id = new JTextField();
txt_id.setBounds(153, 19, 136, 20);
panel.add(txt_id);
txt_id.setColumns(10);
txt_fname = new JTextField();
txt_fname.setBounds(153, 76, 136, 20);
panel.add(txt_fname);
txt_fname.setColumns(10);
txt_lname = new JTextField();
txt_lname.setBounds(153, 130, 136, 20);
panel.add(txt_lname);
txt_lname.setColumns(10);
txt_email = new JTextField();
txt_email.setBounds(153, 184, 136, 20);
panel.add(txt_email);
txt_email.setColumns(10);
txt_username = new JTextField();
txt_username.setBounds(153, 236, 136, 20);
panel.add(txt_username);
txt_username.setColumns(10);
txt_password = new JPasswordField();
txt_password.setBounds(153, 296, 136, 20);
panel.add(txt_password);
JButton btnRegister = new JButton("Register");
btnRegister.addActionListener(new ActionListener() {
public void actionPerformed(ActionEvent arg0) {
String id = txt_id.getText();
String fname = txt_fname.getText();
String lname = txt_lname.getText();
String email = txt_email.getText();
String username = txt_username.getText();
String pwd = txt_password.getPassword().toString();
String emailreg = "^[_A-Za-z0-9-]+(\\.[_A-Za-z0-9-]+)*@[A-Za-z0-9-]+(\\.[A-Za-z0-9-]+)*(\\.[A-Za-z]{2,})$";
if (!(id.isEmpty())
&& !(fname.isEmpty())
&& !(lname.isEmpty() && !(username.isEmpty()) && !(pwd
.isEmpty())) && !(email.isEmpty())) {
if (email.matches(emailreg)) {
if (pwd.length() >= 3) {
Employee newUser = new Employee();
newUser.setId(Integer.parseInt(id));
newUser.setFirtName(fname);
newUser.setLastName(lname);
newUser.setEmail(email);
newUser.setUsername(username);
newUser.setPwd(pwd);
Employee SearchUser = new Employee();
SearchUser.setId(Integer.parseInt(id));
DBObject objSearch = BasicDBObjectBuilder.start()
.append("_id", SearchUser.getId()).get();
DB userDB1 = DBManager.getDatabase();
DBCollection col1 = userDB1.getCollection("Employee");
DBCursor search = col1.find(objSearch);
if (search.hasNext()) {
employeAvailable = true;
JOptionPane.showMessageDialog(null,
"Entered Employee ID Available",
"Registered Message",
JOptionPane.INFORMATION_MESSAGE);
} else {
DBObject doc = createDBObject(newUser);
DB userDB = DBManager.getDatabase();
DBCollection col = userDB.getCollection("Employee");
WriteResult result = col.insert(doc);
JOptionPane.showMessageDialog(null,
"Sucessfully Registered",
"Registered Message",
JOptionPane.INFORMATION_MESSAGE);
}
} else {
JOptionPane.showMessageDialog(null,
"Not a Valid Fname", "Name warning",
JOptionPane.ERROR_MESSAGE);
}
} else {
JOptionPane.showMessageDialog(null,
"Not a Valid Email", "Email warning",
JOptionPane.ERROR_MESSAGE);
}
} else {
JOptionPane.showMessageDialog(null, "Please Fill Details");
}
}
});
btnRegister.setBounds(300, 350, 89, 23);
panel.add(btnRegister);
}
}
A Sample Java EE Application
Creating the Enterprise Application Project
The goal of this exercise is to create the NewsApp enterprise application project. You will use the New
Project wizard to create an enterprise application that contains an EJB module and a web module.
1. Choose File > New Project (Ctrl-Shift-N) from the main menu.
2. Select Enterprise Application from the Java EE category and click Next.
3. Name the project NewsApp and set the project location.
4. Deselect the Use Dedicated Folder option, if selected.
(For this tutorial there is little reason to copy project libraries to a dedicated folder because
you will not need to share libraries with other users or projects.)
Click Next.
5. Set the server to GlassFish Server 3 and set the Java EE Version to Java EE 6.
6. Select Create EJB Module and Create Web Application Module. Click Finish.

When you click Finish, the IDE creates three projects: NewsApp, NewsApp-ejb and NewsApp-war. If
you expand the NewsApp node in the Projects window, you can see that the enterprise application
project does not contain any sources. All the sources will be contained in the two modules that the
wizard created and which are listed under the Java EE Modules node.
The enterprise application project only contains configuration details about the application and is
building the project creates the EAR for deployment. In some cases, the enterprise application project
will contain deployment descriptor files with additional information, but deployment descriptor files are
not required when you create a Java EE enterprise application that is deployed to GlassFish Server 3.
Coding the EJB Module
Creating the Entity Class
In this exercise you will create the NewsEntity entity class. An entity class is a simple Java class that
generally represents a table in a database. When you create the entity class, the IDE adds
the @Entity annotation to define the class as an entity class. After you create the class, you will
create fields in the class to represent the data that you want in your table.
Each entity class must have a primary key. When you create the entity class, the IDE adds
the @Id annotation to declare which field to use as the primary key. The IDE also adds
the @GeneratedValue annotation and specifies the key generation strategy for the primary Id.
To create the NewsEntity class, perform the following steps.
1. Right-click the EJB module in the Projects window and choose New > Other to open the New
File wizard.
2. From the Persistence category, select Entity Class and click Next.
3. Type NewsEntity for the Class Name.
4. Type ejb for the Package.
5. Leave the Primary Key Type as Long in the New Entity Class wizard.
6. Select Create Persistence Unit. Click Next.
7. Keep the default Persistence Unit Name.
8. For the Persistence Provider, choose EclipseLink (JPA2.0)(default).
9. For the Data Source, choose a data source (for example, select jdbc/sample if you want to
use JavaDB).
10. Confirm that the persistence unit is using the Java Transaction API and that the Table
Generation Strategy is set to Create so that the tables based on your entity classes are
created when the application is deployed.

11. Click Finish.
When you click Finish, the IDE creates persistence.xml and the entity class NewsEntity.java.
The IDE opens NewsEntity.java in the Source Editor.
In the Source Editor, perform the following steps.
1. Add the following field declarations to the class:
2. private String title;
private String body;
3. Right-click in the Source Editor and choose Insert Code (Alt-Insert; Ctrl-I on Mac) and select
Getter and Setter to open the Generate Getters and Setters dialog box.
4. Select the body and title fields in the dialog box. Click Generate.When you click Generate, the IDE adds getter and setter methods for the fields.
5. Save the changes to NewsEntity.java.
Creating the Message-Driven Bean
In this exercise you will use a wizard to create the NewMessage message-driven bean in the EJB
module. The wizard will also help you to create the necessary JMS resources. The message-driven
bean receives and processes messages sent to the queue by a servlet in the web module.
To create the message-driven bean, perform the following steps:
1. Right-click the EJB module in the Projects window and choose New > Other to open the New
File wizard.
2. From the Enterprise JavaBeans category, select the Message-Driven Bean file type. Click Next.
Note. In NetBeans IDE 6.9, the Message-Driven Bean file type is in the Java EE category.
3. Type NewMessage for the EJB Name.
4. Select ejb from the Package drop-down list.
5. Click the Add button next to the Project Destination field to open the Add Message Destination
dialog box.
6. In the Add Message Destination dialog box, type jms/NewMessage and select Queue for the
destination type. Click OK.
7. Confirm that the project destination is correct. Click Finish.

When you click Finish, the bean class NewMessage.java opens in the Source Editor. You can see that
the IDE added the @MessageDriven annotation and configuration properties to the class.
@MessageDriven(mappedName = "jms/NewMessage", activationConfig = {
@ActivationConfigProperty(propertyName = "acknowledgeMode",
propertyValue = "Auto-acknowledge"),
@ActivationConfigProperty(propertyName = "destinationType",
propertyValue = "javax.jms.Queue")
})
public class NewMessage implements MessageListener {
The @MessageDriven annotation tells the container that the component is a message-driven bean
and specifies the JMS resource used by the bean. When the IDE generates the class, the Mapped
Name of the resource (jms/NewMessage) is derived from the name of the class
(NewMessage.java). The JMS resource is mapped to the JNDI name of the destination from which
the bean receives messages. The New Message-Driven Bean wizard also adds the information for the
JMS resources to sun-resources.xml. You do not need to configure deployment descriptors to
specify the JMS resources. If you use the Run action in the IDE to deploy the application to GlassFish,
the JMS resources are created on the server on deployment.
The EJB specifications allow you to use annotations to introduce resources directly into a class. You
will now use annotations to introduce the MessageDrivenContext resource into your class, and then
inject the PersistenceContext resource which will be used by the EntityManager API to manage
the persistent entity instances. You will add the annotations to the class in the Source Editor
Inject the MessageDrivenContext resource into the class by adding the following annotated
field (in bold) to the class:
public class NewMessage implements MessageListener {
@Resource
private MessageDrivenContext mdc;
Introduce the entity manager into the class by right-clicking in the code and choosing Insert
Code (Alt-Insert) and choosing Use Entity Manager from the pop-up menu.
Note. In NetBeans IDE 6.9, choose Persistence > Use Entity Manager.
The IDE adds the following @PersistenceContext annotation to your source code.
@PersistenceContext(unitName = "NewsApp-ejbPU")
private EntityManager em;
The IDE also generates the following persist method.
public void persist(Object object) {
em.persist(object);
}
Modify the persist method to change the name to save. The method should look like the
following:
public void save(Object object) {
em.persist(object);
}
Modify the onMessage method by adding the following code (in bold) to the body of the
method.
@Override
public void onMessage(Message message) {
ObjectMessage msg = null;
try {
if (message instanceof ObjectMessage) {
msg = (ObjectMessage) message;
NewsEntity e = (NewsEntity) msg.getObject();
save(e);
}
} catch (JMSException e) {
e.printStackTrace();
mdc.setRollbackOnly();
} catch (Throwable te) {
te.printStackTrace();
}
}
. Right-click in the editor and choose Fix Imports (Alt-Shift-I; ⌘-Shift-I on Mac) to generate
any necessary import statements. Save your changes.
Note. When generating the import statements, you want to make sure to import
the javax.jms and javax.annotation.Resource libraries.
For more details about message-driven beans, see the chapter What is a Message-Driven Bean? in
the Java EE 6 Tutorial, Part I.
Creating the Session Facade
In this exercise you will create a session facade for the NewsEntity entity class. The EJB 3.0
specification simplified the creation of session beans by reducing the amount of required code and
allowing the use of annotations to declare a class as a session bean. The EJB 3.1 specification further
simplifies the requirements for session beans by making business interfaces optional. Sessions beans
can be accessed by local clients either by a local interface or a no-interface view. In this tutorial you
will not create an interface for the bean. The servlets in the web application will access the bean
through a no-interface view.
To create the session facade, perform the following steps:
1. Right-click the EJB module and choose New > Other.
2. From the Persistence category, select Session Beans for Entity Classes. Click Next.
3. Select ejb.NewsEntity from the list of available entity classes and click Add to move the
class to the Selected Entity Classes pane. Click Next.
4. Check that the Package is set to ejb. Click Finish.

When you click Finish, the IDE generates the session facade
class NewsEntityFacade.java and AbstractFacade.java and opens the files in the editor. As
you can see in the generated code, the annotation @Stateless is used to
declare NewsEntityFacade.java as a stateless session bean component. The IDE also adds
the PersistenceContextannotation to inject the resource directly into the session bean
component. NewsEntityFacade.java extends AbstractFacade.java, which contains the
business logic and manages the transaction.
Coding the Web Module
Creating the Singleton Session Bean
The EJB 3.1 specification introduces @Singleton annotation that enables you to easily create
singleton session beans. EJB 3.1 also defines additional annotations for configuring properties of
singleton session beans such as when the bean is instantiated.
After the singleton session bean is instantiated it exists for the lifecycle of the application. As its name
implies, there can only be a single instance of a singleton session bean in the application. Like
stateless session beans, singleton session beans can have multiple clients.
To create the singleton session bean, perform the following steps.
1. Right-click the Web module and choose New > Other to open the New File wizard.
2. Select Session Bean in the Enterprise JavaBeans category.
Note. In NetBeans IDE 6.9, Session Bean is in the Java EE category.
3. Type SessionManagerBean for the EJB Name.
4. Type ejb for the Package name.
5. Select Singleton. Click Finish.

When you click Finish, the IDE creates the singleton session bean class and opens the class in the
editor. You can see that the IDE added the annotation @Singleton to the class to declare a singleton
session bean. The wizard also annotated the class with @LocalBean.
@Singleton
@LocalBean
public class SessionManagerBean {
}
1. Annotate the class with @WebListener and implement HttpSessionListener.
@Singleton
@LocalBean
@WebListener
public class SessionManagerBean implements HttpSessionListener{
}
The @WebListener annotation is part of the Servlet 3.0 API and enables you to implement a
listener directly in your code.
When you implement HttpSessionListener, the IDE displays a warning in the margin. Click the warning badge in the left margin and choose "Implement all abstract methods".

The IDE adds the sessionCreated and sessionDestroyed methods.
Add the static field counter and set the initial value to 0.
@LocalBean
@WebListener
public class SessionManagerBean implements HttpSessionListener{
private static int counter = 0;
Modify the generated bodies of the sessionCreated and sessionDestroyed methods to
increase the value of a field when a new session starts and to decrease the value when a
session finishes. The value will be stored in the field counter.
public void sessionCreated(HttpSessionEvent se) {
counter++;
}
public void sessionDestroyed(HttpSessionEvent se) {
counter--;
}
Add the following method that returns the current value of counter.
public int getActiveSessionsCount() {
return counter;
}
The code for the session bean should now look like the following.
@Singleton
@LocalBean
@WebListener
public class SessionManagerBean implements HttpSessionListener {
private static int counter = 0;
public void sessionCreated(HttpSessionEvent se) {
counter++;
}
public void sessionDestroyed(HttpSessionEvent se) {
counter--;
}
public int getActiveSessionsCount() {
return counter;
}
}
Creating the ListNews Servlet
In this exercise you will create a simple servlet for displaying the stored messages. You will use
annotations to call the enterprise bean NewsEntityFacade from the servlet.
1. Right-click the web module project and choose New > Servlet.
2. Type ListNews for the Class Name.
3. Enter web for the Package name. Click Finish.
When you click Finish, the class ListNews.java opens in the Source Editor. In the source editor,
perform the following steps.
1. Right-click in the source editor and choose Insert Code (Alt-Insert) and select Call Enterprise
Bean.
2. In the Call Enterprise Bean dialog box, expand the NewsApp-ejb node and select
NewsEntityFacade. Click OK.
The IDE adds the @EJB annotation to inject the enterprise bean.
3. Use the Call Enterprise Bean dialog box again to inject the SessionManagerBean under the
NewsApp-war node.
In your code you will see the following annotations that inject the two enterprise beans.
@WebServlet(name = "ListNews", urlPatterns = {"/ListNews"})
public class ListNews extends HttpServlet {
@EJB
private SessionManagerBean sessionManagerBean;
@EJB
private NewsEntityFacade newsEntityFacade;
You can also see that the @WebServlet annotation is used to declare the class a servlet and
to specify the servlet name. The @WebServlet annotation is part of the Servlet 3.0 API
introduced in the Java EE 6 specification. You can identify servlets using the annotation
instead of in the web.xml deployment descriptor. The NewsApp application does not
contain web.xml.
4. In the processRequest method, add the following code (in bold) to return the current
session or create a new one.
5. protected void processRequest(HttpServletRequest request,HttpServletResponse response)
6. throws ServletException, IOException {
7. request.getSession(true);
response.setContentType("text/html;charset=UTF-8");
8. Add the following code (in bold) to the processRequest method to print the messages and
add a link to the PostMessage servlet. (Uncomment the code in the method if necessary.)
9. out.println("<h1>Servlet ListNews at " + request.getContextPath () +
"</h1>");
10.
11. List news = newsEntityFacade.findAll();
12. for (Iterator it = news.iterator(); it.hasNext();) {
13. NewsEntity elem = (NewsEntity) it.next();
14. out.println(" <b>"+elem.getTitle()+" </b><br />");
15. out.println(elem.getBody()+"<br /> ");
16. }
17. out.println("<a href='PostMessage'>Add new message</a>");
18.
19. out.println("</body>");
20. Add the following code (in bold) to retrieve and print the number of users/open sessions.
21. out.println("<a href='PostMessage'>Add new message</a>");
22.
23. out.println("<br><br>");
24. out.println(sessionManagerBean.getActiveSessionsCount() + " user(s)
reading the news.");
25.
26. out.println("</body>");
27. Press Ctrl-Shift-I to generate any necessary import statements for the class. When generating
the import statements, you want to import the java.util libraries.
28. Save the changes to the file.
Creating the PostMessage Servlet
In this exercise you will create the PostMessage servlet that will be used to post messages. You will
use annotations to inject the JMS resources you created directly into the servlet, specifying the
variable name and the name to which it is mapped. You will then add the code to send the JMS
message and the code for the HTML form for adding a message.
1. Right-click the web module project and choose New > Servlet.
2. Type PostMessage for the Class Name.
3. Enter web for the Package name and click Finish.
When you click Finish, the class PostMessage.java opens in the source editor. In the source editor,
perform the following steps.
1. Use annotations to inject the ConnectionFactory and Queue resources by adding the
following field declarations (in bold):
2. @WebServlet(name="PostMessage", urlPatterns={"/PostMessage"})
3. public class PostMessage extends HttpServlet {
4. @Resource(mappedName="jms/NewMessageFactory")
5. private ConnectionFactory connectionFactory;
6.
7. @Resource(mappedName="jms/NewMessage")
private Queue queue;
8. You now add the code to send the JMS messages by adding the following code in bold to
the processRequest method:
9. response.setContentType("text/html;charset=UTF-8");
10.
11. // Add the following code to send the JMS message
12. String title=request.getParameter("title");
13. String body=request.getParameter("body");
14. if ((title!=null) && (body!=null)) {
15. try {
16. Connection connection = connectionFactory.createConnection();
17. Session session = connection.createSession(false,Session.AUTO_ACKNOWLEDGE);
18. MessageProducer messageProducer =session.createProducer(queue);
19.
20. ObjectMessage message = session.createObjectMessage();
21. // here we create NewsEntity, that will be sent in JMS message
22. NewsEntity e = new NewsEntity();
23. e.setTitle(title);
24. e.setBody(body);
25.
26. message.setObject(e);
27. messageProducer.send(message);
28. messageProducer.close();
29. connection.close();
30. response.sendRedirect("ListNews");
31.
32. } catch (JMSException ex) {
33. ex.printStackTrace();
34. }
35. }
36.
37. PrintWriter out = response.getWriter();
38. Add the following lines (in bold) to the processRequest method to add the web form for
adding a message. (Uncomment the code to print the HTML if necessary.)
39. out.println("Servlet PostMessage at " + request.getContextPath() +"</h1>");
40.
41. // The following code adds the form to the web page
42. out.println("<form>");
43. out.println("Title: <input type='text' name='title'><br/>");
44. out.println("Message: <textarea name='body'></textarea><br/>");
45. out.println("<input type='submit'><br/>");
46. out.println("</form>");
47.
48. out.println("</body>");
49. Press Ctrl-Shift-I to generate any necessary import statements for the class.
Running the Project
You can now run the project. When you run the project, you want the browser to open to the page
with the ListNews servlet. You do this by specifying the URL in the Properties dialog box for the
enterprise application. The URL is relative to the context path for the application. After you enter the
relative URL, you can build, deploy and run the application from the Projects window.
To set the relative URL and run the application, do the following:
1. In the Projects window, right-click the NewsApp enterprise application node and select
Properties in the pop-up menu.
2. Select Run in the Categories pane.
3. In the Relative URL textfield, type /ListNews.
4. Click OK.
5. In the Projects window, right-click the NewsApp enterprise application node and choose Run.
When you run the project, the ListNews servlet opens in your browser and displays a list of the
messages in the database. When you first run the project, the database is empty, but you can click
Add Message to add a message.
Troubleshooting
The following are some of the problems you may encounter when creating your project.
Problem with JMS Resources
When using the wizard to create JMS resources, you may see the following server error message in
the output window:
[com.sun.enterprise.connectors.ConnectorRuntimeException:
JMS resource not created : jms/Queue]
This message could indicate that the JMS resource was not created or was not registered with the
application server. You can use the Admin Console of the application server to check, create and edit
JMS resources.
To open the Admin Console, do the following:
1. Confirm that the application server is running by expanding the Servers node in the Services
window of the IDE. A small green arrow next to the application server node indicates the
server is running.
2. Right-click the application server node and choose View Admin Console to open the login
window in your browser.
3. Log in to the server. The default user name and password are admin and adminadmin.
4. In the Admin Console in your browser, expand the Resources node and JMS Resources node in
the left frame.
5. Click on the Connection Factories and Destination Resources links in the left frame to check if
the resources are registered with the server and if necessary modify the resources. If the
resources do not exist, you can create them in the Admin Console.
You need to make sure that the JMS connection factory resource in the PostMessage servlet is mapped
to the correct JNDI name of the JMS connection factory resource registered with the Sun Java System
Application Server.
The following resources should be registered with the Sun Java System Application Server:
• a Destination resource with the JNDI name jms/NewMessage and type javax.jms.Queue
• a Connection Factory resource with the JNDI name jms/NewMessageFactory and
type javax.jms.QueueConnectionFactory
Update / Delete code samples
ListNews Servlet
/*
* To change this license header, choose License Headers in Project Properties.
* To change this template file, choose Tools | Templates
* and open the template in the editor.
*/
package web;
import ejb.NewsEntity;
import ejb.NewsEntityFacade;
import java.io.IOException;
import java.io.PrintWriter;
import java.util.Iterator;
import java.util.List;
import javax.ejb.EJB;
import javax.servlet.ServletException;
import javax.servlet.annotation.WebServlet;
import javax.servlet.http.HttpServlet;
import javax.servlet.http.HttpServletRequest;
import javax.servlet.http.HttpServletResponse;
/**
*
* @author Anushka
*/
@WebServlet(name = "ListNews", urlPatterns = {"/ListNews"})
public class ListNews extends HttpServlet {
@EJB
private NewsEntityFacade newsEntityFacade;
protected void processRequest(HttpServletRequest request, HttpServletResponse response)
throws ServletException, IOException {
request.getSession(true);
response.setContentType("text/html;charset=UTF-8");
try (PrintWriter out = response.getWriter()) {
/* TODO output your page here. You may use following sample code. */
out.println("<!DOCTYPE html>");
out.println("<html>");
out.println("<head>");
out.println("<title>Servlet ListNews</title>");
out.println("</head>");
out.println("<body>");
out.println("<center>");
out.println("<h1>News Manager App</h1>");
List news = newsEntityFacade.findAll();
for (Iterator it = news.iterator(); it.hasNext();) {
NewsEntity elem = (NewsEntity) it.next();
out.println("<a href='UpdateNews?Id="+elem.getId()+"'>Update</a>");
out.println("<a href='DeleteNews?Id="+elem.getId()+"'>Delete</a>");
out.println(" <b>" + elem.getTitle() + " </b>");
out.println(elem.getBody() + "<br /> ");
}
out.println("<a href='PostNews'>Add new news</a>");
out.println("</center>");
out.println("</body>");
out.println("</html>");
}
}
@Override
protected void doGet(HttpServletRequest request, HttpServletResponse response)
throws ServletException, IOException {
processRequest(request, response);
}
@Override
protected void doPost(HttpServletRequest request, HttpServletResponse response)
throws ServletException, IOException {
processRequest(request, response);
}
@Override
public String getServletInfo() {
return "Short description";
}// </editor-fold>
}
UpdateNews servlet
/*
* To change this license header, choose License Headers in Project Properties.
* To change this template file, choose Tools | Templates
* and open the template in the editor.
*/
package web;
import ejb.NewsEntity;
import ejb.NewsEntityFacade;
import java.io.IOException;
import java.io.PrintWriter;
import javax.ejb.EJB;
import javax.ejb.EJBException;
import javax.servlet.ServletException;
import javax.servlet.annotation.WebServlet;
import javax.servlet.http.HttpServlet;
import javax.servlet.http.HttpServletRequest;
import javax.servlet.http.HttpServletResponse;
/**
*
* @author Anushka
*/
@WebServlet(name = "UpdateNews", urlPatterns = {"/UpdateNews"})
public class UpdateNews extends HttpServlet {
@EJB
private NewsEntityFacade newsEntityFacade;
NewsEntity news;
Long id;
protected void processRequest(HttpServletRequest request, HttpServletResponse response)
throws ServletException, IOException {
response.setContentType("text/html;charset=UTF-8");
//Get parameter from query string
if (request.getParameter("Id") != null) {
id = Long.parseLong(request.getParameter("Id").toString());
try {
news = newsEntityFacade.find(id);
} catch (EJBException e) {
e.printStackTrace();
}
} else {
news = new NewsEntity();
//ce.setCusID("");
news.setTitle("");
news.setBody("");
}
//update action
String title = request.getParameter("title");
String body = request.getParameter("body");
if (title != null || body != null) {
try {
NewsEntity newsUp = new NewsEntity();
newsUp.setId(id);
newsUp.setTitle(title);
newsUp.setBody(body);
newsEntityFacade.edit(newsUp);
response.sendRedirect("ListNews");
} catch (EJBException ex) {
ex.printStackTrace();
}
}
try (PrintWriter out = response.getWriter()) {
/* TODO output your page here. You may use following sample code. */
out.println("<html>");
out.println("<head>");
out.println("<title>Servlet Update News</title>");
out.println("</head>");
out.println("<body>");
out.println("<center>");
out.println("<h2>Update News</h2>");
out.println("<br/>");
out.println("<form>");
out.println("News Title: <br/>");
out.println("<input type='text' name='title' size='40' value='" + news.getTitle() + "'><br/>");
out.println("News Body: <br/>");
out.println("<input type='text' name='body' size='40' value='" + news.getBody() + "'><br/>");
out.println("<br/>");
out.println("<input type='submit' value='Update News'> <br/>");
out.println("</form>");
out.println("<br/>");
out.println("<a href='ListNews'>Back</a>");
out.println("</center>");
out.println("</body>");
out.println("</html>");
}
}
@Override
protected void doGet(HttpServletRequest request, HttpServletResponse response)
throws ServletException, IOException {
processRequest(request, response);
}
@Override
protected void doPost(HttpServletRequest request, HttpServletResponse response)
throws ServletException, IOException {
processRequest(request, response);
}
@Override
public String getServletInfo() {
return "Short description";
}// </editor-fold>
}
DeleteNews servlet
/*
* To change this license header, choose License Headers in Project Properties.
* To change this template file, choose Tools | Templates
* and open the template in the editor.
*/
package web;
import ejb.NewsEntity;
import ejb.NewsEntityFacade;
import java.io.IOException;
import java.io.PrintWriter;
import javax.ejb.EJB;
import javax.ejb.EJBException;
import javax.servlet.ServletException;
import javax.servlet.annotation.WebServlet;
import javax.servlet.http.HttpServlet;
import javax.servlet.http.HttpServletRequest;
import javax.servlet.http.HttpServletResponse;
/**
*
* @author Anushka
*/
@WebServlet(name = "DeleteNews", urlPatterns = {"/DeleteNews"})
public class DeleteNews extends HttpServlet {
@EJB
private NewsEntityFacade newsEntityFacade;
NewsEntity news;
Long id;
protected void processRequest(HttpServletRequest request, HttpServletResponse response)
throws ServletException, IOException {
response.setContentType("text/html;charset=UTF-8");
//Get parameter from query string
if (request.getParameter("Id") != null) {
id = Long.parseLong(request.getParameter("Id").toString());
try {
news = newsEntityFacade.find(id);
} catch (EJBException e) {
e.printStackTrace();
}
} else {
news = new NewsEntity();
//ce.setCusID("");
news.setTitle("");
news.setBody("");
}
//Delete from button click
String idval = request.getParameter("idval");
if (idval != null ) {
try {
NewsEntity newsDel = new NewsEntity();
newsDel.setId(id);
newsEntityFacade.remove(newsDel);
response.sendRedirect("ListNews");
} catch (EJBException ex) {
ex.printStackTrace();
}
}
try (PrintWriter out = response.getWriter()) {
/* TODO output your page here. You may use following sample code. */
out.println("<html>");
out.println("<head>");
out.println("<title>Servlet Delete News</title>");
out.println("</head>");
out.println("<body>");
out.println("<center>");
out.println("<h2>Delete News</h2>");
out.println("<br/>");
out.println("<form>");
out.println("News Id: <br/>");
out.println("<input type='text' name='idval' size='40' value='" + news.getId()+ "'><br/>");
out.println("News Title: <br/>");
out.println("<input type='text' name='body' readonly='readonly' size='40' value='" + news.getTitle()+ "'><br/>");
out.println("News Body: <br/>");
out.println("<input type='text' name='body' readonly='readonly' size='40' value='" + news.getBody() + "'><br/>");
out.println("<br/>");
out.println("<input type='submit' value='Delete News'> <br/>");
out.println("</form>");
out.println("<br/>");
out.println("<a href='ListNews'>Back</a>");
out.println("</center>");
out.println("</body>");
out.println("</html>");
}
}
@Override
protected void doGet(HttpServletRequest request, HttpServletResponse response)
throws ServletException, IOException {
processRequest(request, response);
}
@Override
protected void doPost(HttpServletRequest request, HttpServletResponse response)
throws ServletException, IOException {
processRequest(request, response);
}
@Override
public String getServletInfo() {
return "Short description";
}// </editor-fold>
}
Subscribe to:
Comments (Atom)